

How To Remove Yoke From Rear Differential
The pinion seal, as well called a pinion shaft, is designed to keep oil in and any h2o, clay or debris out. Equally long as the pinion seal is in place and performing well, the differential will stay in good shape and operate as information technology is supposed to. A failed pinion seal can issue in a minor leak where fluid seeps out, or a major leak that can ruin the differential bearings and gears. As long as the seal is replaced in a timely fashion, there will be trivial chance of any internal damage taking place.
Materials Needed
- ⅜ Ratchet
- ⅜ Socket gear up - Metric and Standard
- ½ Ratchet - at to the lowest degree a eighteen inches long for leverage
- ½ Breaker bar - 24 inch
- ½ Socket set - Metric and Standard
- ½ socket for pinion nut - this volition demand to be adamant when disassembling
- Ball peen hammer
- Brake cleaner
- Drain pan
- Gear oil
- Jack
- Jack Stands
- Mallet/plastic hammer
- Metric wrench ready
- Paint marker
- Pinion Seal
- Puller fix
- Repair Manual - For torque specifications
- RTV Silicone
- Seal puller
- Shop towels
- Standard wrench set up
- Wheel Chocks
Part i of 8: Securing your vehicle
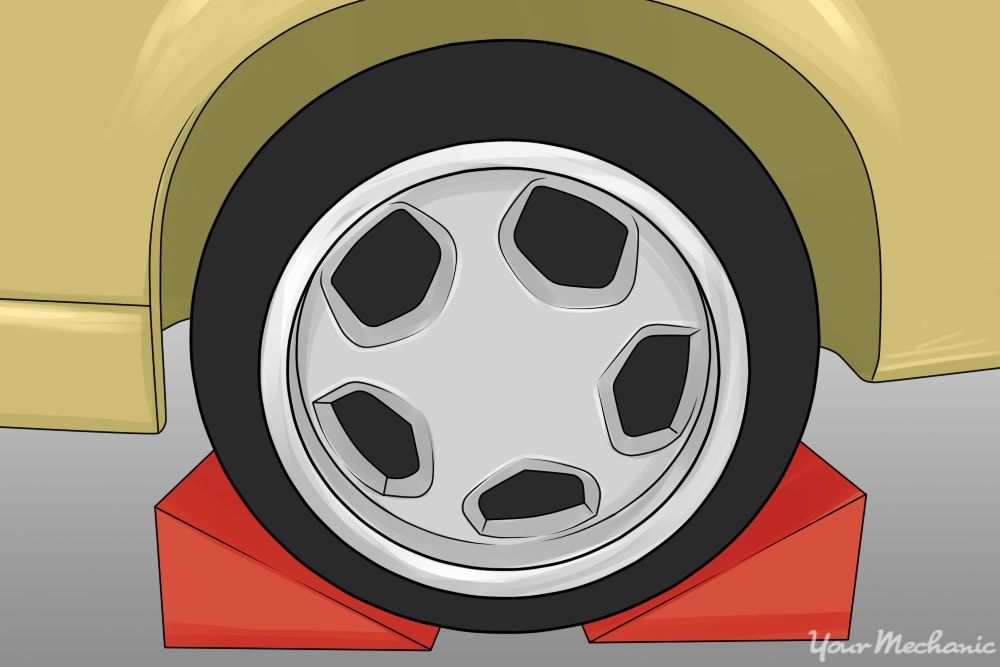
Step 1: Chock the front wheels. Information technology is recommended to lift your vehicle on flat basis. Chock the front and rear of 1 front tire to forbid your vehicle from rolling frontwards or backward.
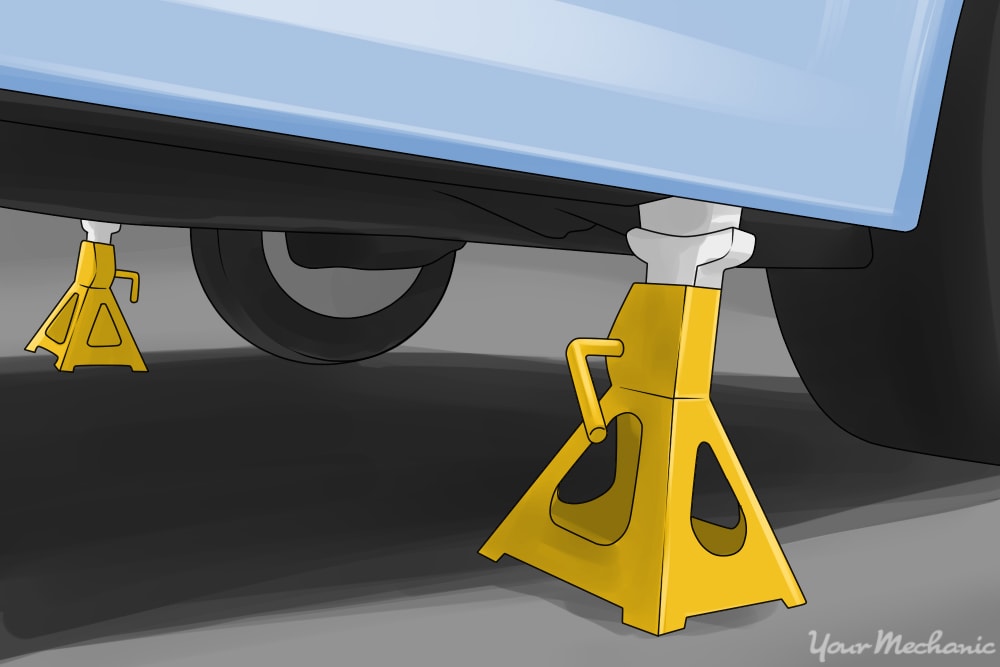
Step 2: Raise the axle. Raise the axle loftier enough that yous are comfortable working underneath.
Stride 3: Set the jack stands. Set the jack stands securely nether each side of the beam.
Part 2 of 8: Removing the driveline
Step one: Gear up the parking restriction. Set the parking restriction on your vehicle. This will stabilize the beam to keep it from moving and will assist in the process.
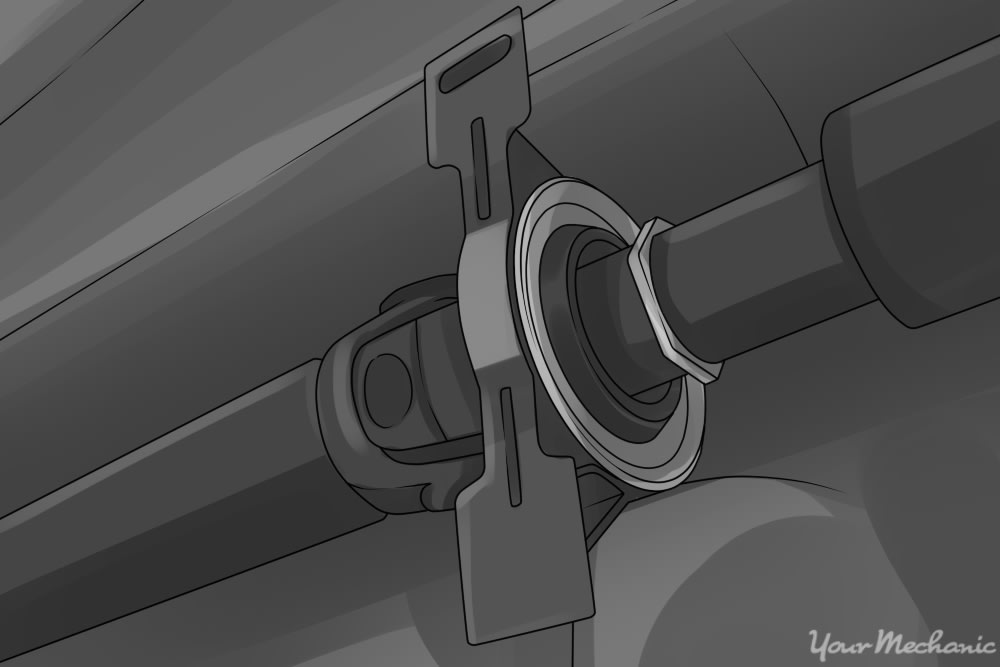
Stride two: Secure the driveline. Use a bungee or a strap to support to the driveline. This will prevent the driveline from falling on you when separated from the flange/yoke.

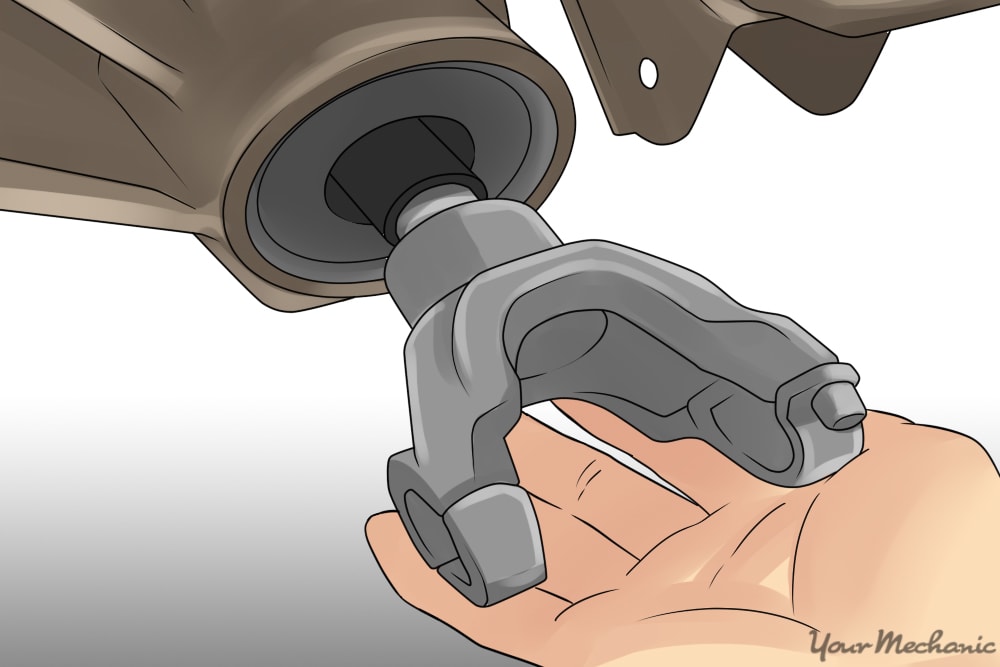
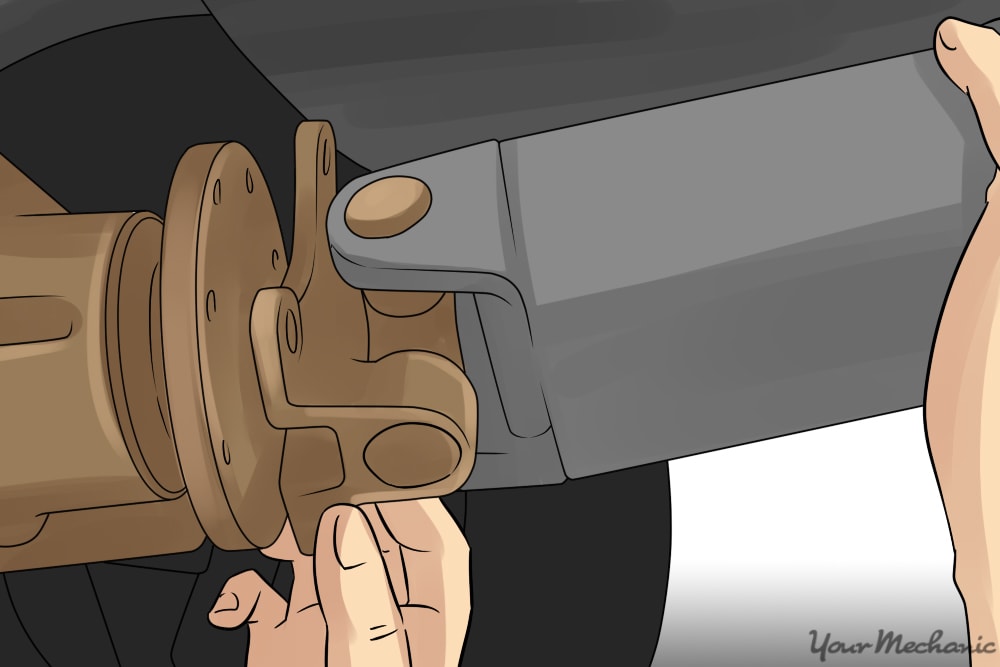
Footstep 3: Remove the driveline mounting bolts. These are located where the driveline and axle come across.
Footstep 4: Separate the driveline. Using a mallet or plastic hammer, strike the end of the driveline away from the flange.
Once the driveline is separated from the flange, you can either necktie it up and out of the style or remove information technology completely from the transmission.
- Annotation: If yous determine to remove the driveline, place a drain pan underneath the end of the transmission. The paradigm above shows where the fluid will come out and where to set bleed pan. The other stop of the driveline will slide out of the transmission and fluid volition drizzle out and into the drain pan.
Part three of eight: Removing the axle flange
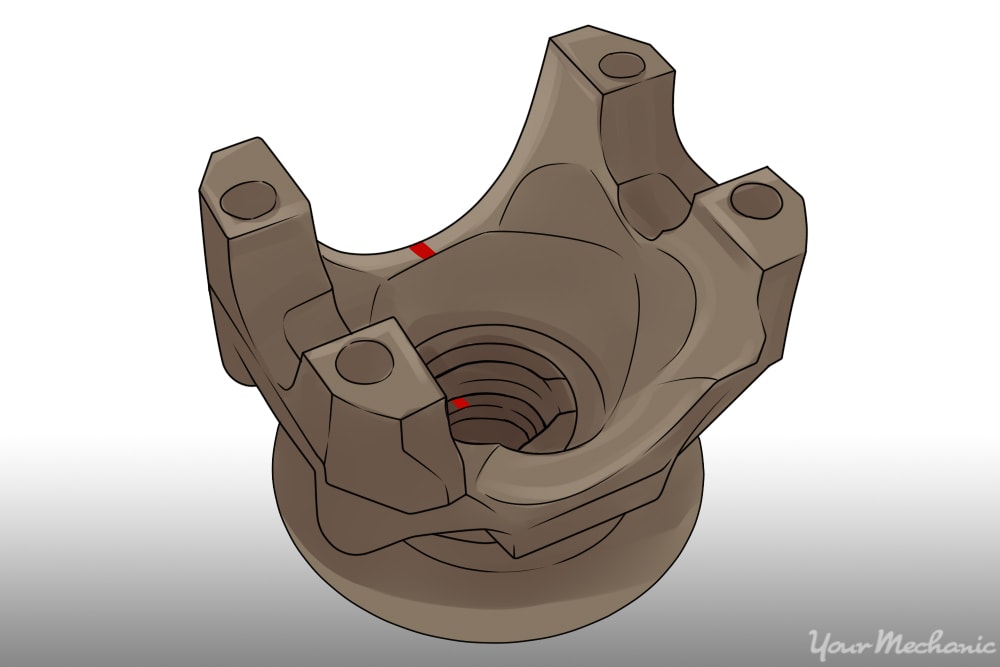
Step 1: Brand reference marks. Mark the position of the flange and pinion shaft with a paint pen. You lot will as well want to count the exposed threads and write the number down.
This is washed so the correct amount of torque is applied and information technology won't be overtightened.
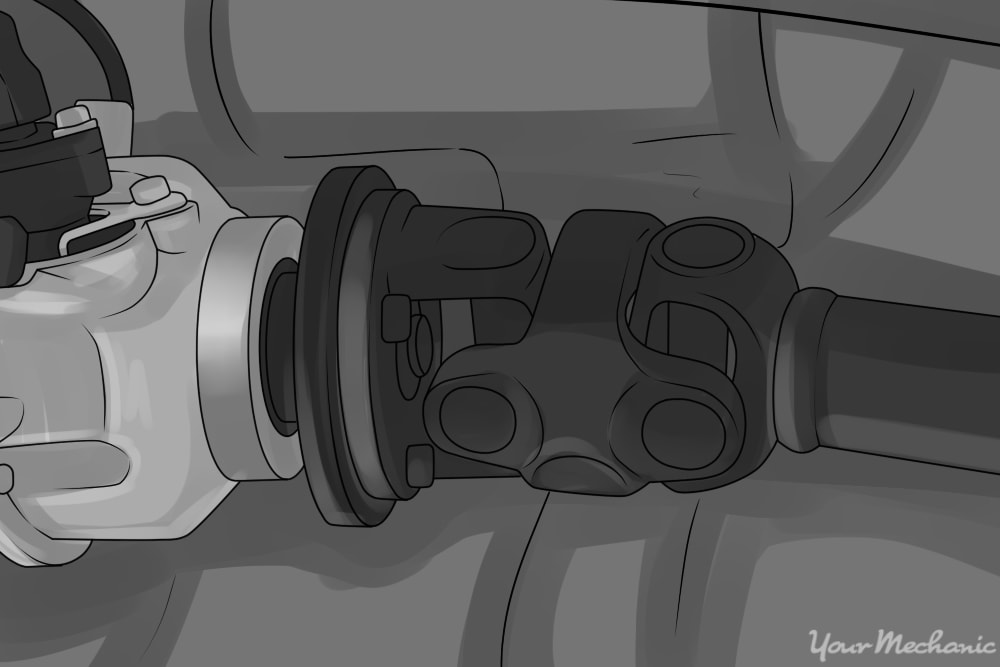
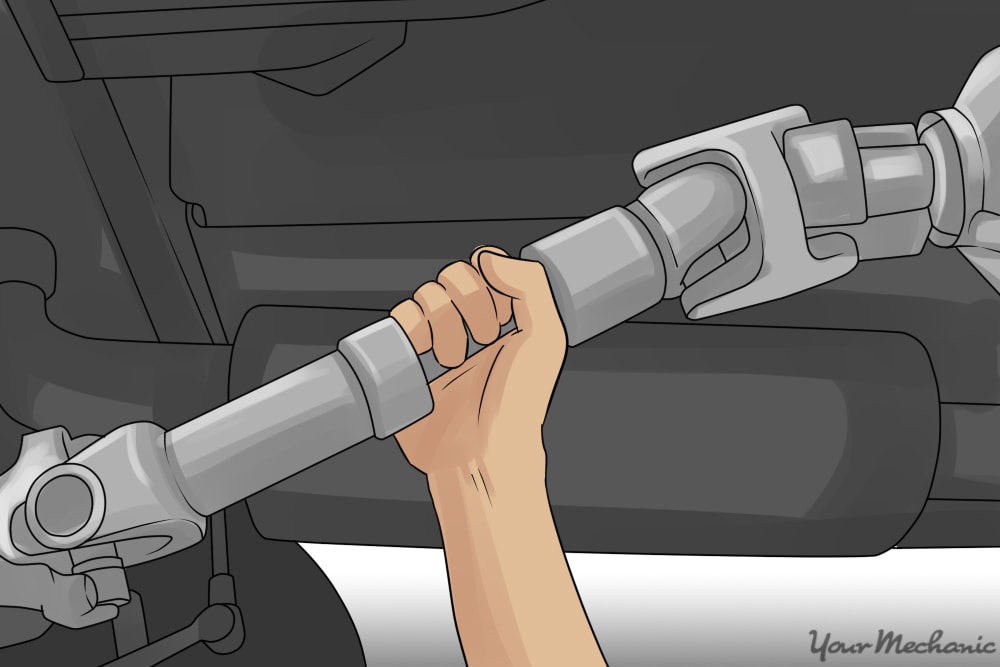
Step 2: Remove the flange/yoke nut. Remove the mounting nut on the flange/yoke.
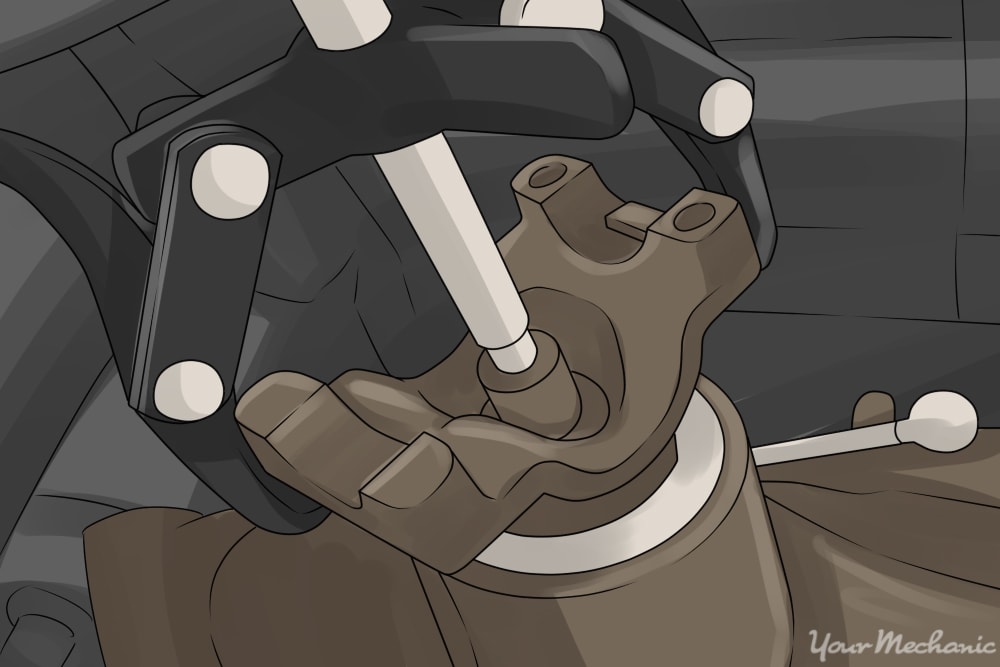
Stride iii: Install the puller. To remove the flange/yoke, you lot volition need to use a puller. Install the puller so that it is secure and volition pull the flange/yoke off evenly from the pinion.
The driving shaft of the puller needs to be centered as in the image to a higher place. The arms of the puller will need a solid foursquare edge to pull on.
Step four: Apply the puller to remove the flange/yoke. Once the puller is in place and mounted, past slowly tightening the drive shaft it volition brainstorm pulling the flange/yoke off the pinion shaft.
In most cases, continue driving the eye shaft until the the flange comes loose and off the pinion shaft.
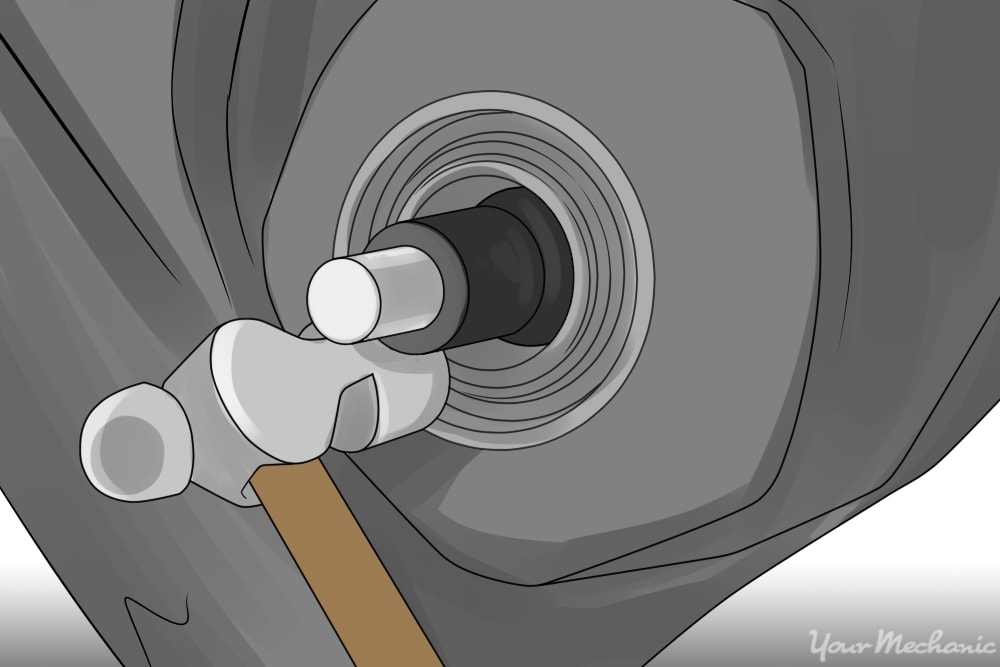
Part four of viii: Removing the pinion seal
Step 1: Set up a drain pan. Place a drain pan underneath the pinion seal area.
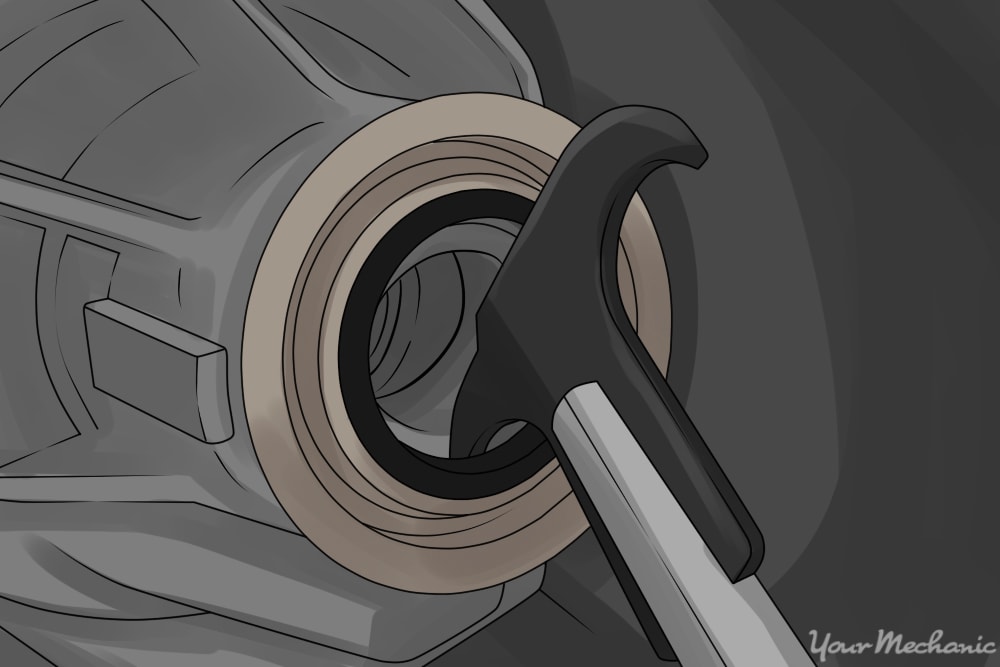
Step 2: Remove the seal. Have a seal puller, claw the inside of the seal and pry to remove the seal. It may take a couple of dissimilar placements to get it removed.
Footstep 3: Prep the area. After the pinion seal is removed, clean the inside surface of the pinion seal mounts.
Get whatever dirt and crud removed and the surface cleaned and prepared for the new seal.
Role 5 of 8: Installing the new pinion seal
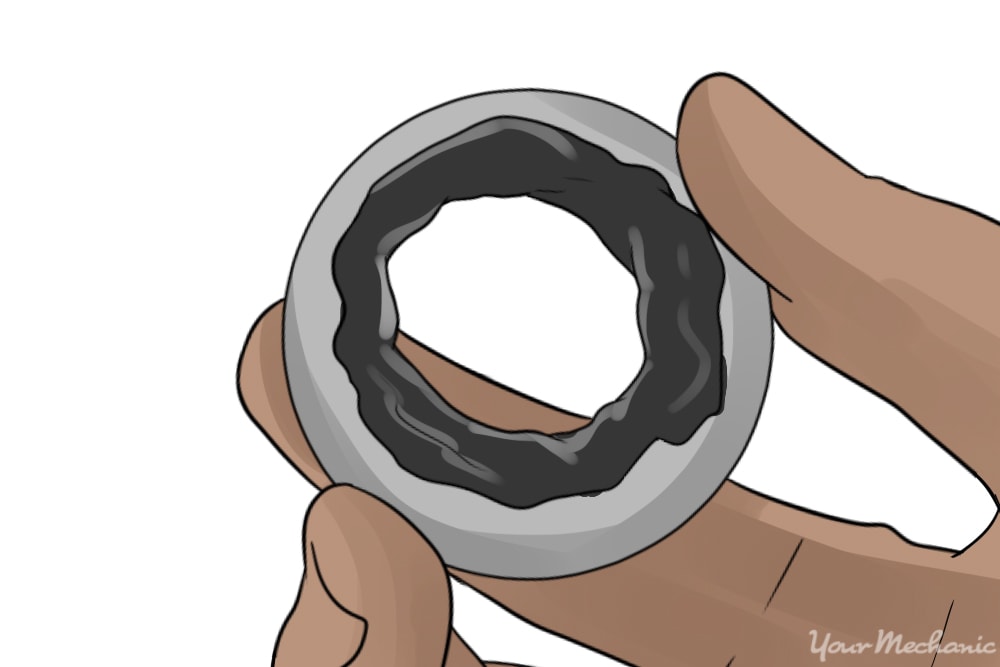
Step 1: Utilise RTV silicone. Employ a thin layer of RTV silicone on the mating surface of the new seal. The mating surface will in virtually cases take an orange or dark-green sealing surface.
Step 2: Install the new pinion seal. Position the seal according to how it needs to exist installed against the beam housing.
With the seal in position, begin tapping on a seal edge to begin seating it. When borer, tap in a cross design and then you are installing the seal as evenly as possible. Doing this will prevent any damage to the new pinion seal.
One time the seal begins to seat, tap the seal until information technology is flush with the beam housing. After it is installed, inspect the seal to be certain it is flush with the axle housing.
Part 6 of 8: Installing the axle flange/yoke
Step one: Apply RTV silicone. Apply a small bead of RTV silicone to the inside of the flange/yoke on the splines.
Step 2: Utilize lubrication where needed. Apply a sparse layer of grease to the polish surface that is going into the pinion seal.
Step 3: Install the flange/yoke. Brand certain to match the reference marks that you made.
Step four: Seat the flange/yoke. Once the flange is in place, you may need to employ a mallet to get the flange/yoke to seat enough to become the washer and nut started.
Step five: Utilise silicone to the pinion washer and install. Before tightening the nut, put a minor bead of RTV silicone on the inside of the flat washer.
Install the washer and nut onto the pinion.
Pace 6: Tighten the pinion nut. As you lot are tightening, inspect after every turn to sentry the reference marks and to continue an centre on the number of threads exposed on the end of the shaft (where the red arrow points in the image above).
Step 7: Line upward the reference marks. When yous attain the number of threads needed, bank check the paint marks to see if they are lined up equally you marked.
If they are not lined up, you may have to tighten it up slightly to friction match.
Part 7 of 8: Installing the driveline
Step 1: Reinsert the driveline. If you removed the driveline earlier, start past inserting the driveline carefully into the transmission extension housing.
If you just secured the driveling without removing information technology, just release the drive line from where it was tied upward.
Step 2: Mount the driveline. Elevator, line up, and mount the driveline to the flange/yoke.
The driveline slides in and out of the transmission; this will give you lot the travel needed to arrange and mount the driveline.
Step 3: Mountain and tighten the bolts. Once you have the flange/yoke in place, get-go the mounting bolts. Tighten the mounting bolts to specifications.
Role viii of eight: Lowering and checking fluid levels

Step 1: Remove the axle fill plug. Y'all will use your finger to check the axle fluid level. The fluid level should be merely below the fill hole. If it is depression, add what is needed.
Footstep two: Raise the vehicle. Raise the vehicle off the jack stands.
Stride three: Remove the stands. Remove the jack stands and lower the vehicle by releasing the jack.
Pace 4: Release the brake. Release the parking brake now that your vehicle is safely on the footing.
Replacing a leaking pinion is very of import in preventing any major repairs. The pinion seal leaking is a good indicator that something needs attention. If replacing your pinion seal is something you would rather leave to a professional, have one of YourMechanic'due south certified technicians perform the replacement.
The statements expressed above are simply for informational purposes and should exist independently verified. Please run across our terms of service for more than details
Source: https://www.yourmechanic.com/article/how-to-replace-a-pinion-seal-by-michael-gonzales
0 Response to "How To Remove Yoke From Rear Differential"
Post a Comment